wkgtk-html2pdf technical manual


Typeseetting with HTML

rev V0.1.09.20260312_01

Index

1. Introduction

wkgtk-html2pdf is a powerful and easy-to-use API for converting HTML content into high-quality PDF documents using WebKitGTK. Developed as a modern alternative to legacy tools like wkhtmltopdf—which has been archived since 2023—this project fills the gap for reliable, up-to-date HTML-to-PDF conversion. It provides a clean, intuitive C++ API that simplifies HTML generation by eliminating the need for string literals and explicit closing tags, making it ideal for embedding in applications. The tool supports advanced features such as internal anchors, links, and nested sidebar indexing, enabling the creation of structured, navigable PDFs. A simple command-line interface is also available for quick, one-off conversions. With its focus on maintainability and modern development practices, wkgtk-html2pdf is designed to be a reliable choice for developers seeking a dependable solution for PDF generation.

This project is entirely inspired by wkhtmltopdf as when we were searching for a replacement we simply could not find one, and even the paid for options seemed overly complex where they needn't be and severely lacking where they should. We have tried to iron out some of the issues we have encountered along the way and have produced this manual to assist with those unavoidable issues that must be worked around. We hope that you find this project useful and we would be very much appreciative of any contribution, be that funding, documentation, testing, or design.

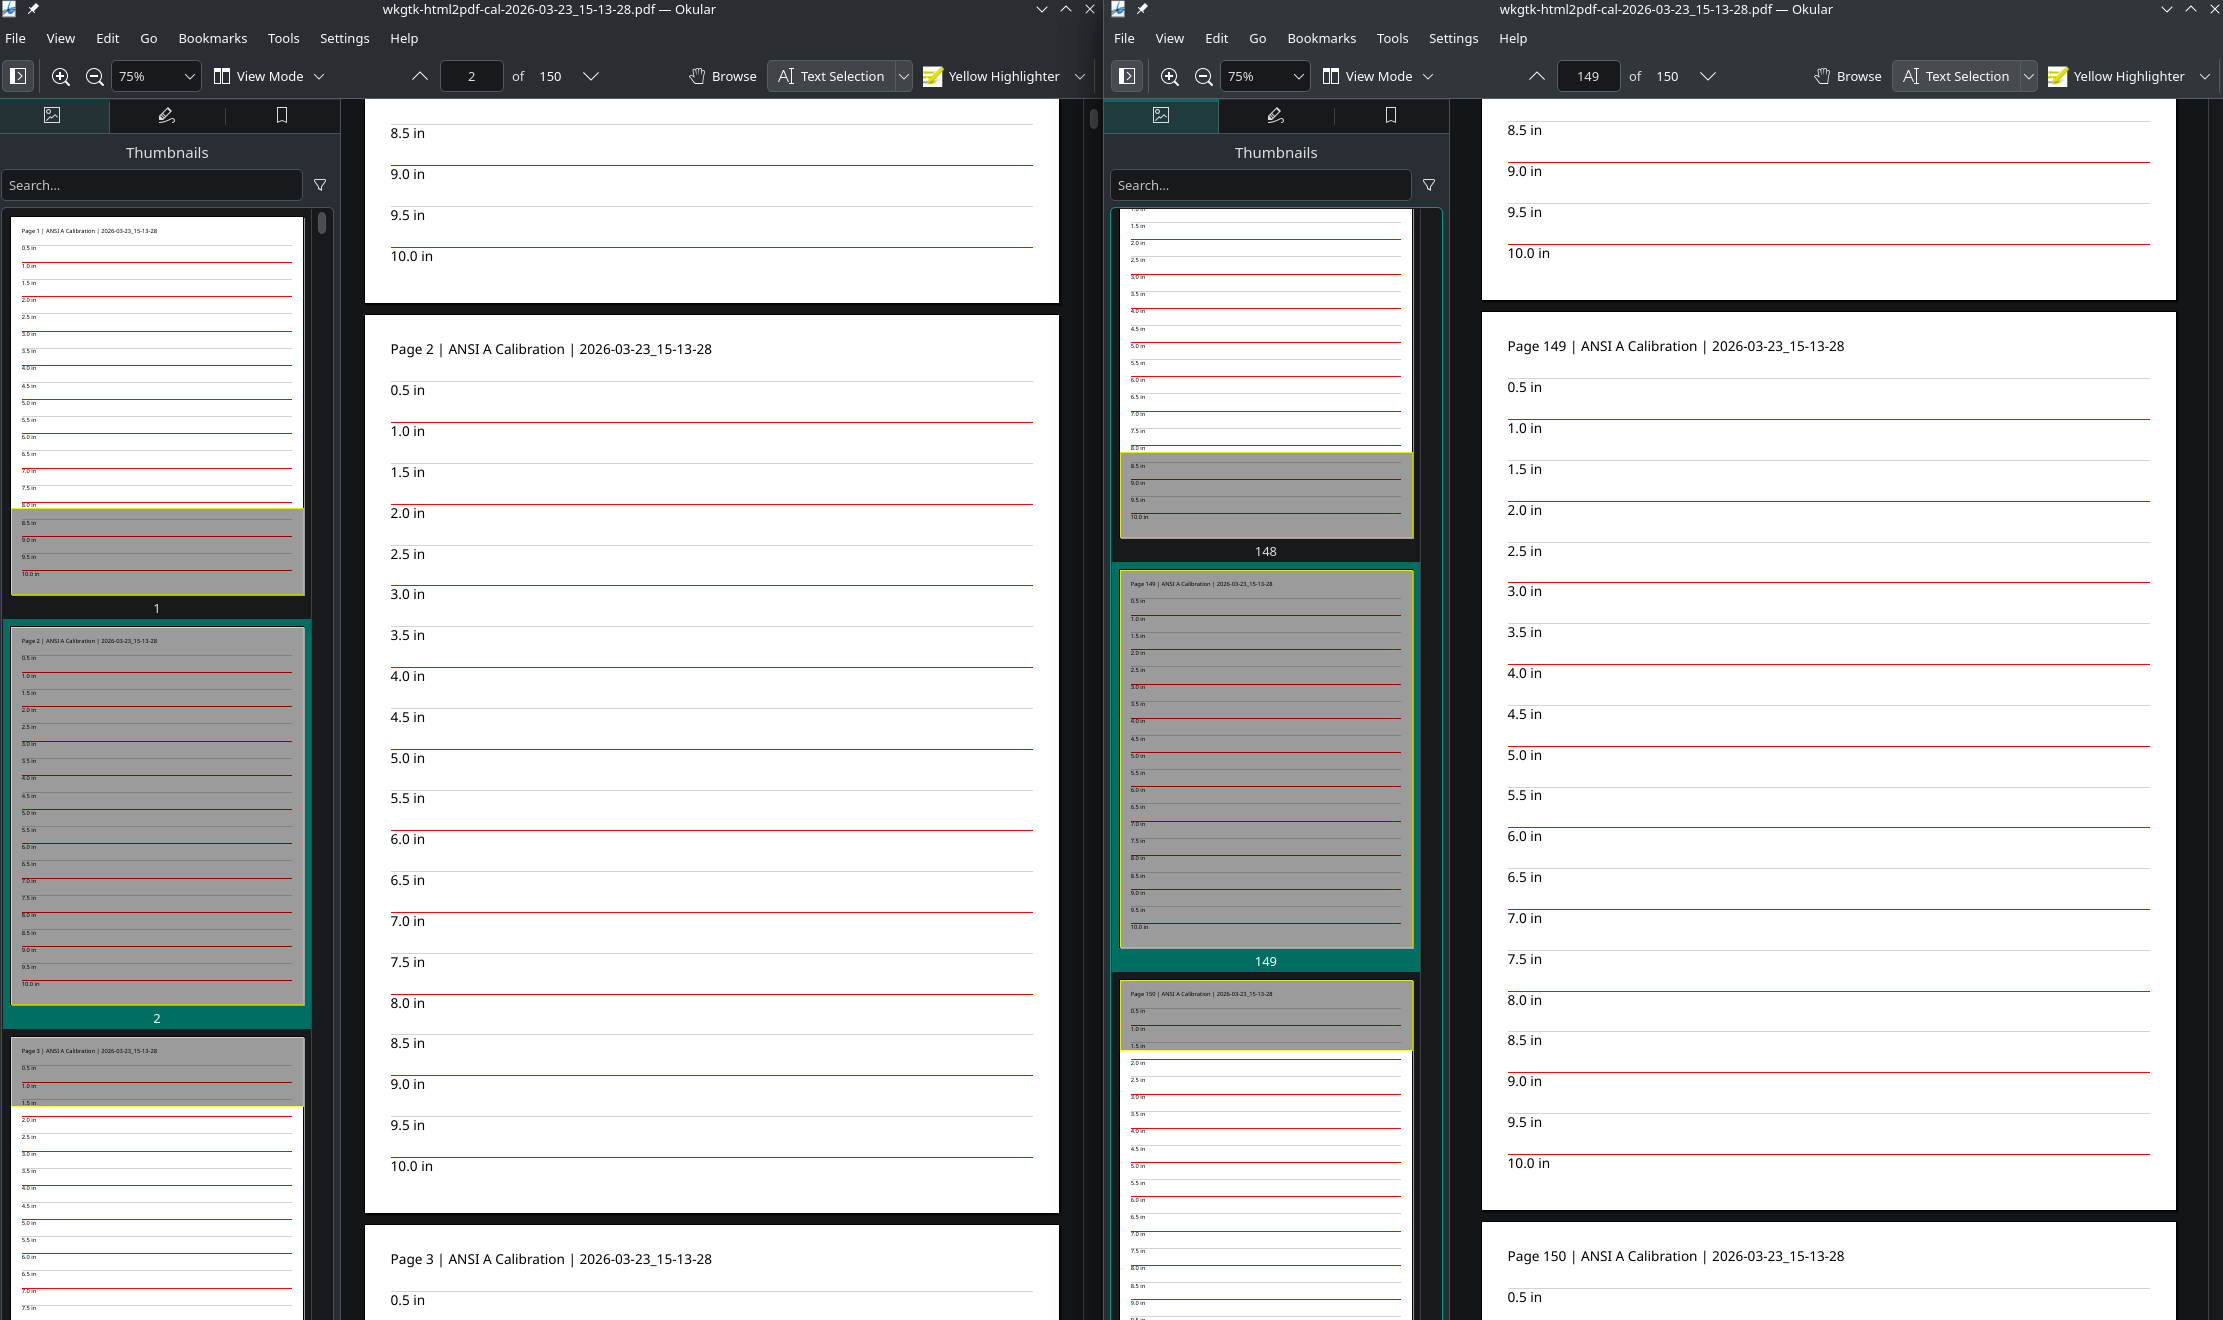
wkgtk-html2pdf includes a set of built-in, pre-configured CSS templates for all standard ISO and US paper sizes, ensuring compatibility and consistency across different regions and use cases. These templates are designed to prevent the generation of extraneous blank pages by precisely defining page dimensions, margins, and layout constraints using CSS custom properties.

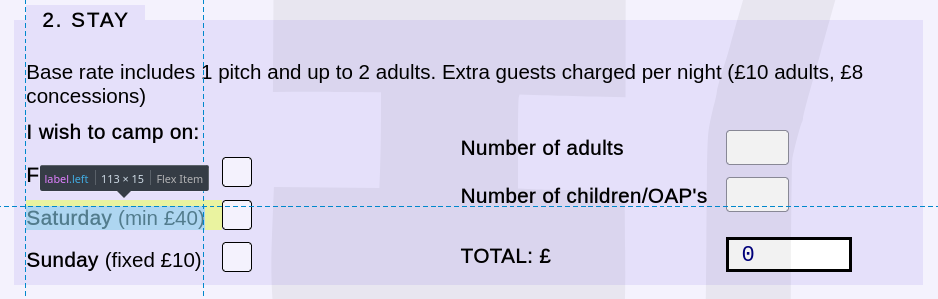
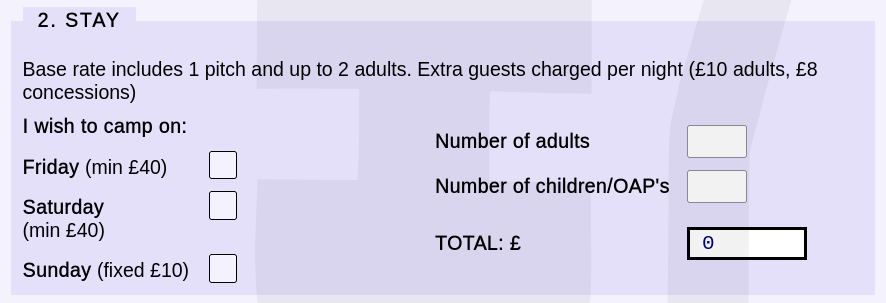
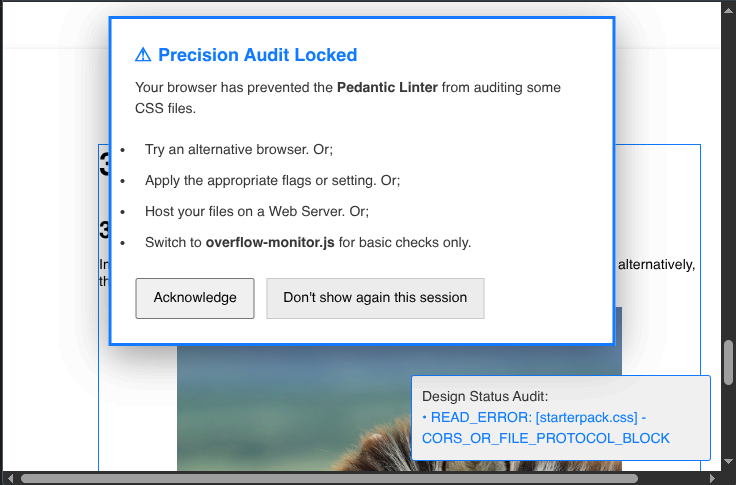
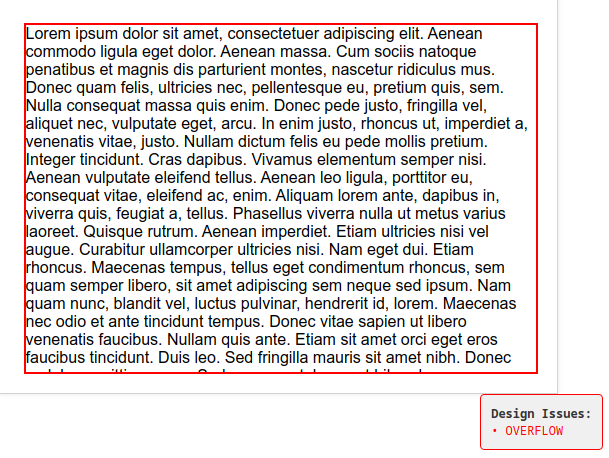
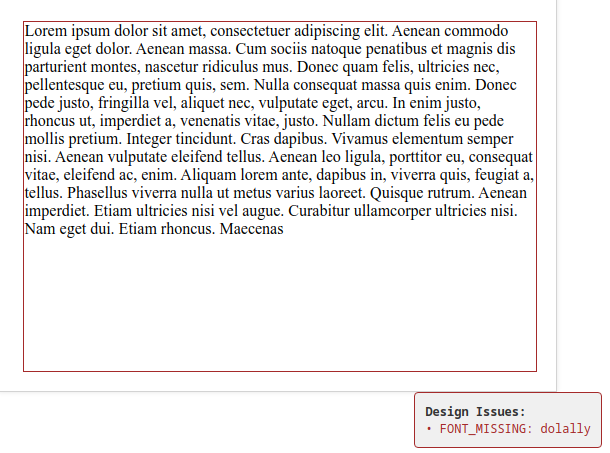
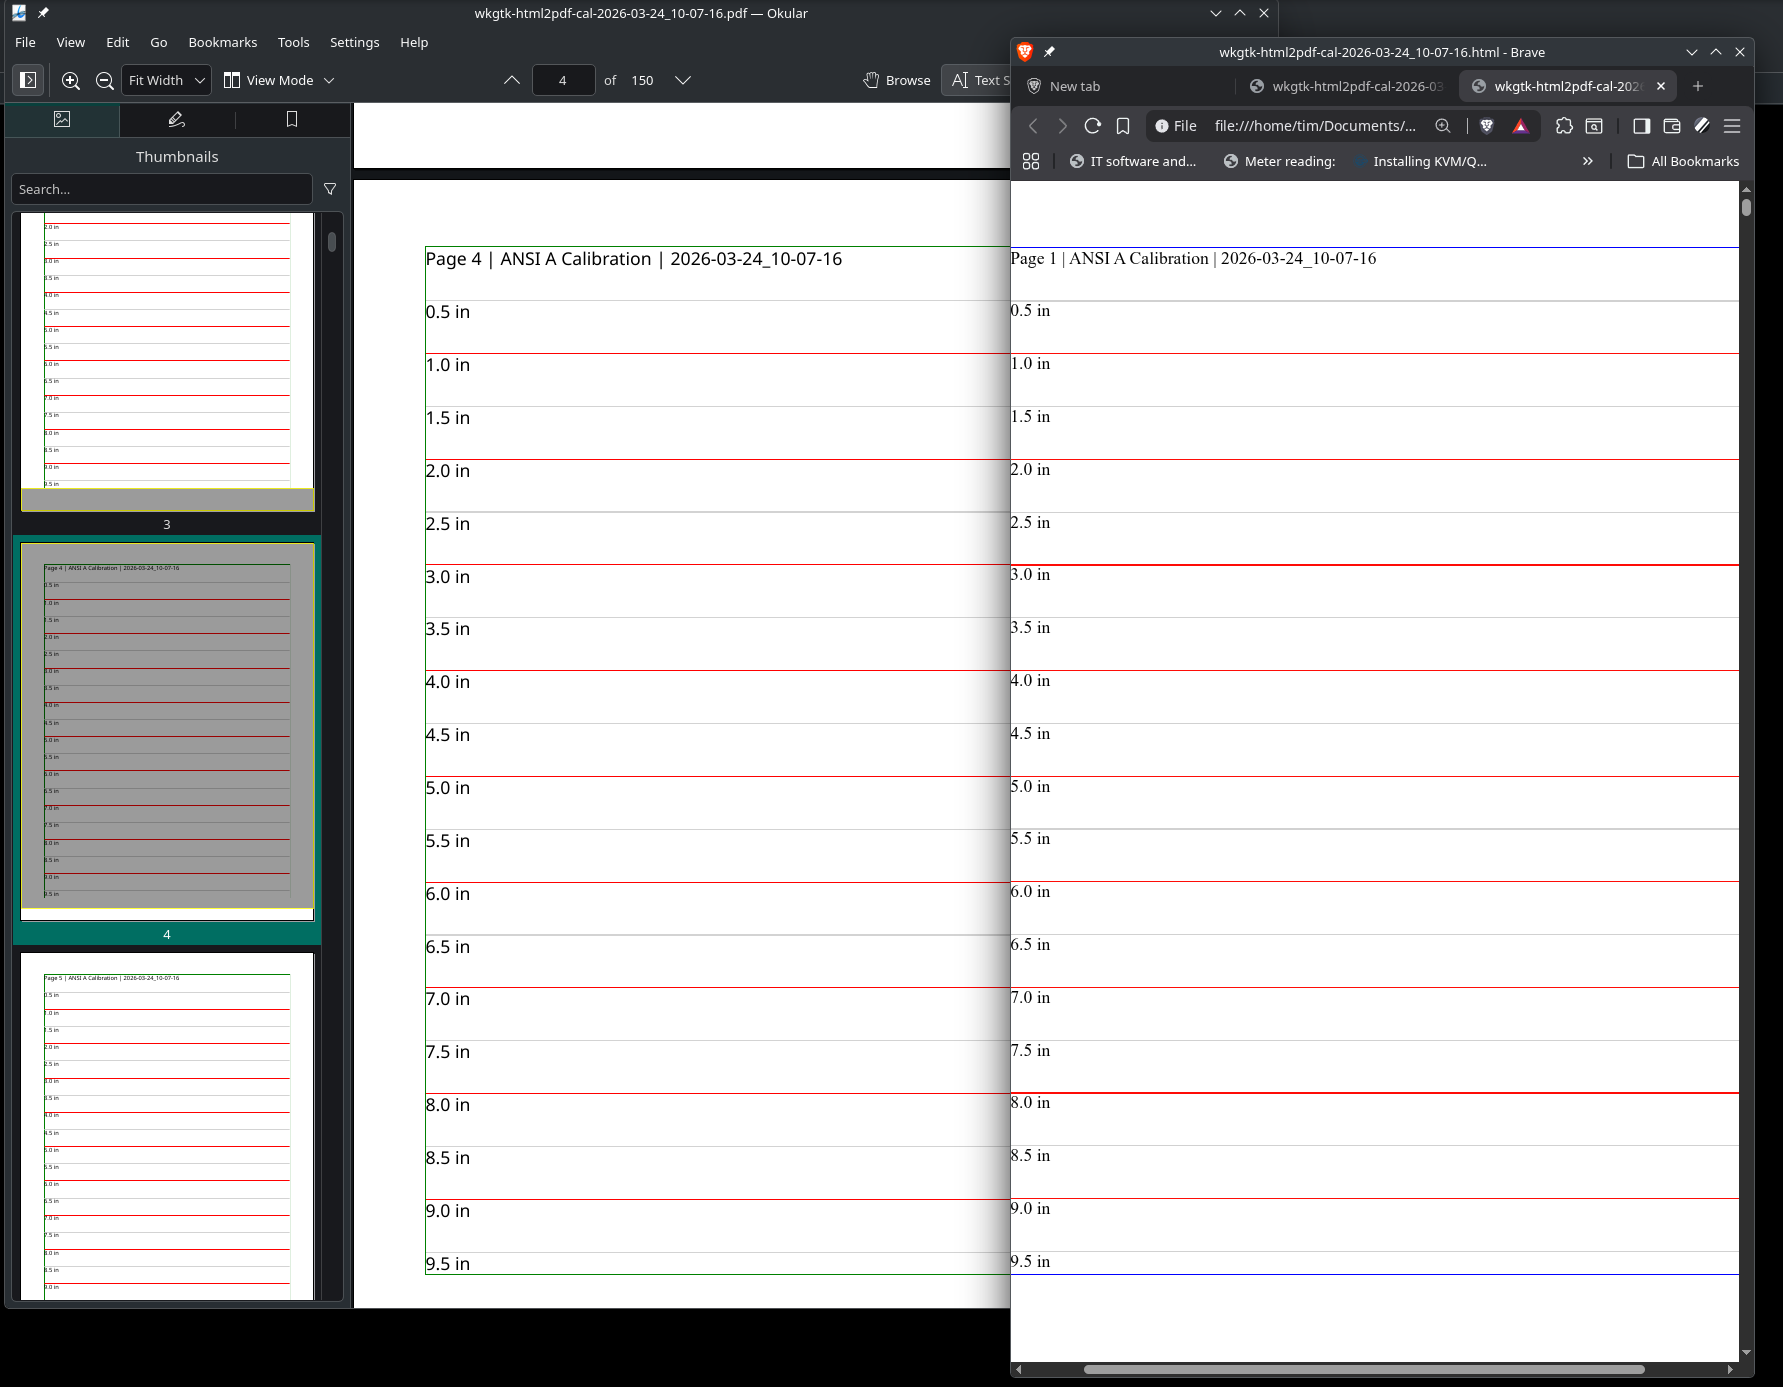
Each template uses a clean, modular structure with variables for page width, height, and margin, allowing for easy customization while maintaining reliable output. A lightweight JavaScript utility is included to monitor content overflow in real time—when content exceeds the available space, the subpage border turns red; when it fits perfectly, the border turns green. This visual feedback helps you quickly identify and resolve layout issues before conversion.

The templates also include print-specific CSS rules that ensure clean, artefact-free output when the HTML is rendered to PDF, while maintaining visual guides during development for easier debugging and refinement.

In wkgtk-html2pdf we have endeavoured to create a system that does not require you to learn additional languages; all you should need is a reasonable understanding of HTML.

1.1 Reading this manual

This manual is a self fulfilling prophecy as it is developed entirely using wkgtk-html2pdf so the layout the code that is used to write it is in itself a tutorial. If you are uncertain about how something is done then is worth reviewing the HTML and CSS used to generate it.

Note: The strict guidance in this manual is intended for the generation of high quality reliable screen to print multi page technical manuals and other mission critical documents. For non critical documents and forms it may not be necessary to adhere to certain aspects.

1.2 Architectural Philosophy: Built for Stability

Unlike many wrapper libraries that expose internal dependencies to the host application, wkgtk-html2pdf is engineered with a strict Binary Interface (ABI). We utilize the Pimpl (Pointer to Implementation) idiom throughout the C++ API to create a "firewall" between the library's internal logic and your application. This tedious but essential design choice provides several critical benefits:

2. Command line interface (CLI)

The CLI is the simplest way to get started with wkgtk-html2pdf. It allows you to convert HTML files into PDFs with minimal setup.

2.1 Basic Usage

To generate a PDF using the default settings use the following command:

html2pdf -i input.html -o output.pdf
Generate a basic pdf with default settings (A4 portrait).

2.2 Command line options

The following options are available for the cli.

Option Description
-h, --help Display the help message with all available options.
-v, --verbose Set the log level (1-7), with higher values providing more detailed output. Logs are written to the system journal.
-i, --infile Specify the source HTML file to convert.
-o, --outfile Specify the output PDF file name.
-O, --orientation Set page orientation: portrait or landscape.
-s, --size Set the page size (Default A4)
- ISO (A): A0, A1, A2, A3, A4, A5, A6, A7, A8, A9, A10
- ISO (B): B0, B1, B2, B3, B4, B5, B6, B7, B8, B9, B10
- ISO (C): C0, C1, C2, C3, C4, C5, C6, C7, C8, C9, C10
- US: Letter, Legal, Tabloid
- ANSI: ANSIA, ANSIB, ANSIC, ANSID, ANSIE
- Architectural: ArchA, ArchB, ArchC, ArchD, ArchE
- Other: SRA0, SRA1, SRA2, SRA3, SRA4
--index Create anchor points for indexing: classic or enhanced for nested sidebar indexing.
-r --relative-uri look for resources such as images in, or relative to, the current working folder.

3. Optimising HTML

To generate a clean, professional PDF, you must optimize your HTML to ensure it aligns with the desired page size and layout. The output is entirely governed by the CSS and HTML structure, so the quality of the final PDF depends on how well your content is designed.

3.1 Key Principles

3.1.1 Use the correct stylesheet

  1. Each stylesheet is named according to the page size and orientation it supports (e.g. A4-portrait.css, ANSIA-landscape.css).
  2. Link to the appropriate stylesheet in your HTML:
Example:
<link rel="stylesheet" href="/usr/share/wk2gtkpdf/A4-portrait.css">
Applying the Style Sheet for A4 portrait.

3.1.2 Use the correct classes

  1. Use the .page class to define the overall page
  2. Use the .subpage class to define content areas.
Example:
<div class="page">
    <div class="subpage">
        <!-- Your page content here -->
    </div>
</div>
Initialising page boundaries

3.1.3 Monitor the overflow

  1. If you are not using our linter then Include the JavaScript utility to monitor content overflow.
  2. If overflow is detected the margin turns red.

This script provides real-time feedback, helping you identify and fix layout issues before conversion (See Section 6.2).

<script src="/usr/share/wk2gtkpdf/overflow-monitor.js><script>
Declaring the JavaScript to monitor the overflow.

3.1.4 Units: Points vs. Pixels

While web design traditionally relies on pixels (px), high-stakes typesetting and desktop publishing require points (pt).

The primary reason for this distinction is sub-pixel rounding. Because a physical screen cannot render "half a pixel," the engine must round fractional values up or down. In standard HTML-to-PDF generators, these tiny rounding errors accumulate over a large document, causing significant "creep" where content shifts further out of alignment with every passing page.

Our bundled templates are specifically engineered to isolate these rounding issues to the individual page level, preventing cumulative drift. However, to achieve a document that is truly pixel-perfect and indistinguishable between the Linter Viewer and the final PDF, you should always define measurements in points. Using points bypasses the browser's display scaling and ensures your layout remains 1:1 with the physical print dimensions.

The Conversion Rule: To convert your existing web measurements to the required print standard, simply multiply any pixel value by 0.75 (e.g., 16px * 0.75 = 12pt).

Note: While you can manually convert pixels to points using the 0.75 multiplier, our commercial Refinery Linter can automate this process across entire stylesheets.

3.1.5 Avoid common issues

By designing your HTML and CSS carefully, you have full control over the final PDF output. Avoid common issues: Mismatched stylesheets, incorrect classes, or content overflow can lead to blank pages, cut-off content, or incorrect scaling.

The overflow detection script helps you identify and fix layout issues before conversion.

3.1.6 Best Practices

  1. Always test the layout - Use the overflow detection script to ensure content fits within the page. Adjust the CSS or content as needed to avoid overflow.
  2. Use the correct stylesheet - Ensure the stylesheet matches the CLI arguments (page size and orientation).
  3. Keep it consistent - Use the same page size and orientation in both the CSS and CLI arguments.

3.2 Quick start - A4 Portrait Layout

Below is a minimal, single-page example utilizing the built-in overflow monitor and missing-font detector.

Example:
<!DOCTYPE html>
<html>
    <head>
        <link rel="stylesheet" href="/usr/share/wk2gtkpdf/A4-portrait.css">
    </head>
    <body>
        <div class="page">
            <div class="subpage">
                <h1>My Document</h1>
                <p>This content will be rendered in A4 portrait format.</p>
            </div>
        </div>
    </body>
    <script src="/usr/share/wk2gtkpdf/overflow-monitor.js><script>
</html>
Minimal single page example.

Each declaration of a .page and .subpage container will create a new page. Blank pages can also be inserted by declaring a .page and .subpage container.

4. Anchors

wkgtk-html2pdf offers two indexing modes to generate the PDF sidebar navigation: Classic and Enhanced.

4.1 Classic mode

In Classic mode, the engine automatically scrapes all internal anchors (any <a> tag where the href starts with #) and includes them in the PDF index. This is ideal for simple documents where every link is a significant navigation point.

Example:
<!-- Automatically indexed in Classic Mode -->
<li><a href="#reference">Reference</a></li>
<p><a href="#section1">Section 1</a></p>
<div><a href="#appendix">Appendix</a></div>
All these anchors are valid.

4.2 Enhanced mode

Enhanced mode (--index enhanced) is a professional-grade feature that allows for selective indexing. Only elements explicitly marked with the index-item class,class will appear in the PDF sidebar. This prevents "index noise" in documents with many internal cross-references.

Example:
<!-- This will be included -->
<li class="index-item"><a href="#reference"><span>Reference</span><span>A1</span></a></li>

<!-- This will be ignored -->
<p><a href="#section1">Section 1</a></p>

<!-- This will be included (container type doesn't matter) -->
<div class="index-item"><a href="#appendix">Appendix</a></div>

Most users of technical manuals rely heavily on the PDF sidebar (bookmarks) for navigation. This persistent tree structure is far more practical for digital consultation than a traditional printed index page. Regardless of whether you choose Classic or Enhanced mode, wkgtk-html2pdf automatically constructs a hierarchical sidebar by analysing your HTML structure.

A unique feature of the wkgtk-html2pdf engine is its ability to generate an index from a visible Single Source of Truth. Unlike traditional generators that rely on "header scraping" or hidden metadata declarations, our engine builds the navigation tree directly from the visible numbering system within your document.

By using the section numbers as the primary data point, the hierarchy is nested automatically. This eliminates the need for manual indexing declarations and prevents document "reflow" issues; if the number is visible on the page, it is accurately reflected in the sidebar. This ensures 1:1 parity between the printed table of contents and the digital navigation tree.

4.3.1 Indexing Criteria

For an item to appear in the PDF sidebar index, it must satisfy two conditions:

  1. Unique Linkage - The source anchor must reference a target with a unique ID
    (e.g. <a href=#mylink>)
  2. Numbered Hierarchy - The target element must contain a number. To create nested levels
    (e.g., Section 1.1 inside Section 1.0), use a period separator.
Example:
<a href=#setup_guide>Go to Setup</a>
<h2 id=setup_guide>1.1 System Setup</h2>
Creating an index item.

The engine will parse "1.1" and automatically nest this bookmark under "1.0" in the PDF sidebar.

4.3.2 Enhanced vs. Classic: The Interactive Hit-Box

The primary functional difference between Classic and Enhanced modes is the management of the "Clickable Area."

In Classic Mode, only the text within an anchor <a> is interactive. This often leaves the rest of the line—such as dot leaders or page numbers—inert.

Index Sidebar Image
Sample pdf with sidebar index.

The easiest way to determine the difference it to see it by compiling this manual in in both enhanced and classicmode and click on the links within the index.

Note: This manual is developed to compile in enhanced mode, in classic mode you may notice additional unexpected items in the pdf bookmark bar; this is normal and expected behaviour.

Enhanced Mode solves this by expanding the interactive hit-box to the entire container. By wrapping your anchor in an element with the .index-item class, the engine ensures the entire line becomes a clickable link in the final PDF.

To enable enhanced indexing, simply wrap your anchor as follows:

<span class="index-item"><a href="#section-target" >4.3.1 Technical Specifications</a></span>
Enabling the link in enhanced indexing mode.

Why use enhanced mode:

Unlike many PDF generators, wkgtk-html2pdf supports redundant indexing. You can place multiple .index-item links targeting the same section ID across different pages without "coordinate ghosting." Our engine uniquely maps each physical instance to the target, ensuring that every link remains perfectly interactive regardless of document length.

4.4 Index page

If you have an index page then attaching it to the sidebar is as simple as declaring toc within the page element.

Example:
<div class="page toc">
    <div class="subpage">
        <!-- Your page content here -->
    </div>
</div>
A page declared as the commencement of the table of contents.

The table of contents should be declared exactly once per document.

Note: If it is declared more than once the the first declaration that wkgtk-html2pdf finds will be used and the rest will be ignored.

When you declare a Table of Contents/Index page it will be attached to the top level "Contents" bookmark within the index.

5. Artefacts

5.1 Images

wkgtk-html2pdf offers flexible support for image assets. Whether your project relies on remote, local, or embedded resources, the engine ensures high-fidelity reproduction in the final PDF.

If you are viewing the HTML version of this manual, the randomised image following demonstrates a live remote fetch that will be locked into the PDF upon generation.

Randomised Generic Image
Example: A remote asset embedded at runtime.
Test Image
An image from a static path.

The engine supports most standard remote assets typically declared in the HTML <head>, such as external stylesheets and scripts. However, there is one critical exception: the <base> element.

WARNING: Do not use the <base> tag. Directing the engine to a base URL will currently break the internal indexing and coordinate mapping. This may be addressed in a future release.
<base href="https://www.foo.bar">
Do not use base URL's.

5.3 SVG (Vector Graphics)

wkgtk-html2pdf is a high-fidelity vector engine. To ensure the smallest possible file size and 100% text searchability, we recommend using Pure Vector SVGs (paths, shapes, and text).

Engine PDF Output Fig 5.1: Vector Asset Test
An example vector graphic.
IMPORTANT:Avoid embedding raster images (PNG/JPG) inside SVG files. Our engine prioritises vector integrity; nesting bitmaps within vector containers can trigger full-page rasterisation in the PDF, which disables text selection and impacts render precision.

5.3.1 Layering & Compositing

To maintain 100% text searchability and vector precision when overlaying diagrams on photographs, do not embed the image inside an SVG. Instead, use standard HTML/CSS layering.

Best Practice - Place your background image using an <img> tag or CSS background-image, then use absolute positioning to overlay your SVG or text elements. This ensures the PDF engine treats the layers independently, keeping your text crisp and your file size lean.

<div style="position: relative; width: 400pt; height: 300pt;">
    <img src="engine-part.jpg" style="width: 100%;">
    <svg style="position: absolute; top: 0; left: 0;">
        <!-- Vector callouts here -->
    </svg>
</div>
Example vector overlaying an image.

6. Page design helper

When converting or generating HTML that works seamlessly as a PDF there are several issues that may lead to unexpected results. While not an exhaustive list the following are most common:

  1. Unexpected extra pages - It is not unusual for developers to become extremely frustrated at the fact that they have an extra blank page at the end of their document even though they have done everything right.
  2. Overflow - Content is often missing or going off the page.

This section covers our minimal JavaScript linter that has been developed to detect the most common issues when developing PDF's using HTML.

The JavaScript linter and the styleSheets work together to set up and test the page layout and contents

6.1 CSS Style sheets

When you include the appropriate template for your desired page size and declare a .page and .subpage <div> element. You will note that you now have something on screen that represents the page size of the PDF you are developing. This will include a margin outlined in blue.

When wkgtk-html2pdf is installed locally copies of all of the style sheets are located in /usr/share/wk2gtkpdf/ and can be linked thus:

/usr/share/wk2gtkpdf/templates
Default path of the wkgtk-html2pdf stylesheets.
Note: If you are a designer with no access to the the application you can link to or use the templates hosted on our servers instead.

For a full list of themplates see https://wkgtk-html2pdf/templates

<link="stylesheet" href="https://wkgtk-html2pdf/templates/A4-portrait.css>"
Page template link example.

6.1.1 Customising Templates

By default the template margins are set to the IEEE standard for technical documenatation (Horizontal: 16.9mm; Vertical: 15.8mm) however this can easily be modified in the page template stylesheet to whatever best suits your requirements.

To change the margins modify the values assigned to the following variables in the appropriate template:

Note: The margin is measured in millimetres(mm).

6.1.1.1 Customising the page size

Careful consideration is required when defining custom page sizes; your dimensions must result in a whole number of points to prevent the rendering engine from drifting. The high-precision millimetre values used in our templates are calculated specifically to achieve a perfect, integer Point (pt) value based on the 72 DPI (Points Per Inch) standard.

For US/Imperial page sizes it is a simple matter of dividing the page size by 72.

Points × 72 = Inches

For ISO/Metric page sizes the calculation is a little more complex.

Points ×
(
25.4 72
)
= mm
WARNING: While MathML is the standard for scientific equations, browser support for "stretchy" operators remains inconsistent. For critical documentation where layout parity is required, we recommend using the CSS Flexbox method provided in our templates to ensure brackets and fractions remain perfectly aligned across all platforms.

In all likelihood, if you are looking to set up a custom page size then you are going to want to convert from mm to points. To do so, for both metric and imperial page sizes is is simply ac case of flipping the calculation.

US / Imperial:
Inches × 72 = Points
ISO / Metric:
mm ×
(
72 25.4
)
= Points
Example Walkthrough:

If you require a custom layout of 178mm x 223mm, you must first find the nearest whole-point equivalent to ensure zero-drift rendering:

Note: By anchoring your dimensions to an integer point value, you ensure that your internal 12pt/18pt typographic grid remains perfectly aligned with the physical edge of the page, eliminating cumulative rounding errors across multi-page documents.

To ensure 100% parity between your CSS and the hardware, you must "snap" your height calculation to a whole pixel value before assigning it to your page container.

Finally, convert these integer points back into the high-precision millimetre values required for your CSS :root variables:

:root {
--page-width: 178.1528;
--page-height: 222.9556;
}
Example: Stabilized custom page size.
IMPORTANT: Always round your calculated Point values to the nearest whole integer before converting back to millimetres for your CSS variables.

6.1.1.2 Typography/Raster Synchronising (Optional reading)

While anchoring your layout to Integer Points (pt) ensures typographic consistency and prevents "baseline creep," a secondary calculation is required to satisfy the browser’s internal rendering engine (Webkit/Blink/etc.).

Browsers do not "paint" in millimetres or points; they paint in Physical Pixels (px). At the standard web resolution of 96 DPI, one pixel is exactly 0.75pt. If your calculated page height results in a fractional pixel (e.g., 1190.55pt), the rendering engine will often truncate or "floor" this value to the nearest whole pixel to fit the physical display or print buffer.

Note: If your CSS content height is even 0.001pt taller than the browser's "floored" pixel container, the engine will trigger an Overflow. This is the primary cause of "Ghost Pages"—that dreaded blank page at the end of a document.
mm ×
(
96 25.4
)
Floor(px) × 0.75 = Webkit Height (pt)

By using this formula, you are essentially pre-calculating the browser's "Hard Ceiling."

In our templates, this is handled automatically via CSS Variables in the :root block. By rounding down to the nearest pixel, we guarantee that the content area is always exactly equal to, or infinitesimally smaller than, the physical paper—resulting in zero-drift , zero-overflow rendering at any size.

Typographic Logic

In our templates, this is handled automatically via CSS Variables in the :root block. By rounding down to the nearest pixel, we guarantee that the content area is always exactly

These values are constants and shouldn't be adjusted

6.1.1.3 Element calculations

While the Raster Logic manages the outer page internal container calculations ensure that every line of text sits perfectly on a predictable physical pixel.

Standard CSS line-heights (like 1.5 or 1.4) often result in fractional pixels (e.g., 16.8px) which may cause unexpected display anomalies. The same applies to font sizes eg. 16pt.

To achieve zero-drift all objects need to be declared in whole pixel values that are reconcilable with the point unit scale.

The Synchronisation Formula:
Note: Whether it is line height, font size, margins, padding, or any other measurement the formula is the same: Convert it to whole pixels, round it off and convert it back again.
pt = ( ⌊pt ÷ 0.75⌋ ) × 0.75

6.1.2 Using the page templates

Each default template has a margin that is visible to the compositor while they are designing the manual in order to assist with visualisation of the page and to assist in hightlighting overflow.

A6 Landscape Template Image
A blank A6 page with margins outlined.

6.2 JavaScript helper utility

wk2gtk-html2pdf includes a helper utility to aid with design. It is located in the same folder as the CSS templates and can be used to identify problems before trying to generate a PDF.

There are 2 versions of the linter that can be used depending on how critical your output is.

The basic linter will detect errors that will result in significant drift while the pedantic linter aims to detect most known issues.

WARNING: At the current stage of development and for the foreseeable future the linters should be considered experimental.

To use the utility you need to declare it:

<script src=""/usr/share/wk2gtkpdf/overflow-monitor.js"><script>
Basic linter declaration
<script src=""/usr/share/wk2gtkpdf/overflow-monitor-pedantic.js"><script>
Pedantic linter declaration

Once declared, when you open the page in a browser it will automatically monitor changes and notify as and when it detects issues.

6.2.1 Monitored Issues

Depending on which version of the linter you choose determines which issues are monitored. The basic linter monitors issues that are certain to cause rendering problems while the the pedantic linter monitors issues that may cause issues.

IMPORTANT: The font checker can only determine if a font is available at design time, it cannot determine whether it is available system wide or whether it is available on a remote server.
Issue Basic Pedantic Issue
Overflow Elements exceeding the physical page or grid boundaries.
Missing Fonts Verification of font availability at design time.
px Declarations Check for pixel measurement declarations.
em Declarations Check for relative declarations.
Dirty precision Check for sub-pixel rounding errors.
IMPORTANT: Browsers will likely restrict access to resources that the pedantic linter needs to check your fonts. At the time of writing this seems to be limited to Linux.
Blink Engines

For Chrome based engines on linux try the following from the command line (replace chromium with whatever flavour of blink engine you wish to use eg. brave):

chromium  --allow-file-access-from-files 

In one test we had to use chromium --user-data-dir="/tmp/audit_session" --disable-web-security --allow-file-access-from-files --disable-features=BlockInsecurePrivateNetworkRequests

Gecko Engines

We have only tested firefox and in tests all seemed to work out of the box on every operating sytsem but Linux where we had to go into about:config and change security.fileuri.strict_origin_policy to false.

WebKit Engines

Despite sharing our WebKitGTK core, Epiphany’s security model is too rigid for local font auditing. Unlike Chromium or Firefox, it lacks the necessary flags to bypass the restrictions required by the linter.

6.2.2 Font Management

To ensure your typography renders exactly as intended, please observe the following requirements:

  1. System-Wide Installation: Fonts must be installed in the system font directory (e.g., /usr/share/fonts on Linux). The rendering library cannot "see" fonts stored only in local user directories or temporary session folders.
  2. Web Fonts (WOFF/WOFF2): Modern web font formats are supported, provided they are hosted in a location accessible to the rendering engine at the time of PDF generation.
WARNING: You should always declare a default global font in your CSS to prevent the browser and the rendering engine from arbitrarily picking one.

If you are generating a PDF on a different machine than the one you are developing on then you must ensure that the relevant fonts are also installed on the generator machine.

If anything, including text, is overflowing the available space the margin will turn red and the notification window will warn of a problem.

When there is a problem with overflow all the margins will turn red however the margins where overflow is present will have a thicker border.

Overflow Indicator Image
Notification when the content goes outside of the page margin

6.2.2.1 How to Resolve Overflows

If you see the red notification shown above, your content has exceeded the calculated subpage height. To fix this, you should:

  1. Reduce the amount of text or the size of your images on the affected page.
  2. Adjust your line-height or font-size in your CSS.
  3. Check for ghost white space or padding at the bottom of your elements.

In addition to the detection of overflow it should also be capable of detecting missing fonts. This is to be considered advisory and if there are rendering issues the first thing that should be checked is the system wide availability of fonts.

Note: While font detection is highly effective, the technical nature of font substitution means it should be considered advisory rather than an absolute guarantee. If your PDF layout shifts unexpectedly, always verify the system-wide availability of your fonts first.
Missing Font Indicator Image
Notification when a missing font is detected

6.2.3 Using Google Fonts & CDNs

Standard web typography services like Google Fonts are fully supported. Since these are remote artefacts, WebKitGTK will fetch them at render-time.

Note: While Google Fonts work perfectly in a connected environment, we recommend downloading the .ttf or .woff files and installing them system-wide if you need to generate PDFs in an offline or firewalled environment (such as a secure server or CI/CD pipeline).

7. Hints and Tips

7.1 Page Numbering

While you will note that the pages in this manual are numbered you will also note that they are not referenced and merely exist to give the reader a sense of familiarity; While you are welcome to use page numbers if you so wish, we strongly recommend using Section Numbers (e.g., See Section 6.2) only in your index instead.

Particular care should be taken when porting documents as the likelihood of page references remaining intact are low.

If you do wish to use page numbers for your indexing then we advise that you develop your document in the follwing order:

  1. Prepare the whole HTML document without any .page or .subpage elements
  2. If the index is at the front of the document then insert as many .page and .subpage elements as would be required to hold the entlre index. (skip this step if your index is at the back of the document).
  3. Iterate through the document inserting .page and .subpage elements and closing them off where necessary.
  4. Paginate the document applying an id to each page number
  5. Generate the index in the reserved space

NOTE: It may be necessary to reflow the pagination if you amend the document.

7.1.1 Our Recommendation

In PDF documents it is rare for the page number determined by the reader to the the same as the page number marked at the bottom of the page; this is because PDF readers start counting from the very first page (often the document cover which is not paginated).

  1. Maintenance Zero - Section numbers are 'set and forget.' They remain accurate regardless of how the content flows across physical pages.
  2. Digital Precision - Our indexing engine maps the exact XY coordinates of your anchors. Clicking "Section 6.2" in the PDF will always take the reader to the correct content, even if a layout change shifts that content from Page 10 to Page 11.
  3. The 'Reflow' Nightmare - Referencing physical page numbers in your text requires manual updates every time your template or content changes. Using section-based anchors eliminates this entire category of error.

In this manual, as the page numbers are merely to give the reader a sense of familiarity they are automatically inserted by utilising CSS' built in counter function; this is how we do it:

To start the counter from a particualr page simply add a class of .number to that page

<div class="page number">
Commence numbering from a given page

Once you have instantiated a .number class the following pages will automatically be paginated; it is not necessary to add .number to additional pages and will in fact cause the page counter to be reset.

WARNING: Adding the .number class to every page will reset the counter to 1.

Here is the CSS for the page numbering used in this manuals

div.page.number {
counter-reset: page 0;
}
div.page.number,
div.page.number ~ div.page {
    counter-increment: page;
}

div.page.number div.subpage::after,
div.page.number ~ div.page div.subpage::after {
    display: block;
    content: " Page - " counter(page);
    position: absolute;
    bottom: 0px;
    right: 0px;
    z-index: 999;
    padding: 2px 8px;
    border-right: 2px solid #23b8e7;
    font-size: 12px;
}
An automated page counter positioned towards the bottom right of the subpage

We are all used to seeing links underlined on web pages but for some it can seem an unnecessary distraction when transcribed to a PDF. Albeit subjective (as all design is) personally I like to get rid of the underline but keep the blue colour just to hint to the user that it is clickable.

To change this or any formatting specifically for pdf generation you use the @media print directive in your CSS.

@media print {
            a {
                text-decoration-line: none !important;
            }
        }
Remove the underline from links for PDF

7.3 Remove the visible page margin

By default the blue margin used to aid design will be displayed in any HTML version; You should hide it rather than remove it to properly maintain the page dimensions.

.subpage {
    border: solid white !important;
}
Hide the margin guide

7.4 The Reference Baseline Template

To accelerate development, the suite includes technical-manual.css. This is a carefully calculated baseline that provides the fundamental geometry for technical documentation.

Features:

The template is by no means mandatory, but is the quickest way to get started or to test the suite is suited to your needs is to link to it either from our templates repository or the the default folder if you have the library installed (See: 6.1 CSS Style sheets)

7.4.1 Provisions

7.4.1.1 Note box

Note: This note box layout is included in the technical-manual.css template.

7.4.1.2 Important box

IMPORTANT: This important box is included in the technical-manual.css template.

7.4.1.3 Warning box

WARNING: This warning box is included in the technical-manual.css template.

7.4.1.4 Index With Leaders

7.5 Development environment setup

Depending on what we are doing we use both of these setups (sometimes even both at once), but as long as you have something to preview and something to write code on you shouldn't run into difficulties.

7.5.1 Pulsar-edit/VSCode

Without doubt our favourite IDE for developing anything HTML is Pulsar-edit.

We are reliably informed that VS Code is another solid alternative that works similarly however we haven't used it ourselves.

On the following pages we have provided the snippets that we use to speed up development in both pulsar edit and VSCode.

WARNING: While we can confirm with some degree of certainty that the pulsar-edit version works we have only conducted limited testing with VSCode.

7.5.1.1 Pulsar Edit Snippets

'.text.html.basic':
  'Page and Subpage':
    'prefix': 'hpage'
    'body': """
      <div class="page">
          <div class="subpage">
              $1
          </div>
      </div>
    """
  'Code Box':
    'prefix': 'hcode'
    'body': """
      <div class="code-container">
          <div class="code-container-sub">
              <pre><code>$1</code></pre>
          </div>
      </div>
    """
  'Note':
    'prefix': 'hnote'
    'body': """
      <div class="note-box">
          <span class="note-icon">ℹ</span>
          <div>
              <strong>Note:</strong>
              $1
          </div>
      </div>
    """
  'Warning':
    'prefix': 'hwarn'
    'body': """
      <div class="warning-box">
          <span class="warning-icon">⚠</span>
          <div>
              <strong>WARNING:</strong>
              $1
          </div>
      </div>
    """

...cont'd

  'Important':
    'prefix': 'himportant'
    'body': """
      <div class="important-box">
          <span class="important-icon">★</span>
          <div>
              <strong>IMPORTANT:</strong>
              $1
          </div>
      </div>
    """

7.5.1.2 VSCode

{
    "Page and Subpage": {
        "prefix": "hpage",
        "body": [
            "<div class=\"page\">",
            "    <div class=\"subpage\">",
            "        $1",
            "    </div>",
            "</div>"
        ],
        "description": "Insert page and subpage container"
      },
      "Code Box": {
        "prefix": "hcode",
        "body": [
            "<div class=\"code-container\">",
            "    <div class=\"code-container-sub\">",
            "        <pre><code>$1</code></pre>",
            "    </div>",
            "</div>"
        ]
      },

...cont'd

     "Note": {
        "prefix": "hnote",
        "body": [
            "<div class=\"note-box\">",
            "    <span class=\"note-icon\">ℹ</span>",
            "    <div>",
            "        <strong>Note:</strong> $1",
            "    </div>",
            "</div>"
        ]
    },
    "Warning": {
        "prefix": "hwarn",
        "body": [
            "<div class=\"warning-box\">",
            "    <span class=\"warning-icon\">⚠</span>",
            "    <div>",
            "        <strong>WARNING:</strong> $1",
            "    </div>",
            "</div>"
        ]
    },
    "Important": {
        "prefix": "himportant",
        "body": [
            "<div class=\"important-box\">",
            "    <span class=\"important-icon\">★</span>",
            "    <div>",
            "        <strong>IMPORTANT:</strong> $1",
            "    </div>",
            "</div>"
        ]
    }
}
IMPORTANT: When pasting snippets into snippets.cson (Pulsar) or html.json (VS Code), ensure the indentation is flush-left within the body strings. Any leading whitespace in the snippet source will be rendered as a physical offset.

7.5.2 Vim and a browser

If you love vim then you probably don't need us to tell you how to set up your environment but in testing we have found that previewing the output with Falkon browser results in the almost real time updates on save without need to manually refresh the page refresh. While probably not the world's greatest browser for daily internet use we have found it the best solution for live previewing while using your favourite text editor (be that vim, nano, or something less hardcore) to design your pages.

8. Calibration

Unlike traditional "Headless" PDF generators that function as black boxes, the wkgtk-html2pdf engine includes a built-in forensic calibration suite. We do not ask you to trust our coordinate mapping; we provide the tools to verify it.

8.1 Why Calibrate

A PDF is a physical map. Even a 0.1pt rounding error in a CSS rendering engine can lead to Point-Creep, where content subtly shifts over a long document. By using the --calibrate flag, you generate a 150-page "Stress Test" that proves the engine's 1:1 parity between the virtual DOM and the physical page.

8.1.1 The Dual-Output Strategy

The calibrator generates both a .pdf and an .html file from a single internal source. This creates a "Digital Reference" that allows for a three-stage validation:

8.1.2 When to Calibrate

Because the engine relies on the host system's WebKit and font libraries, we recommend a calibration pass during the following "High-Stakes" events:

WARNING: Always re-calibrate after a system-wide update. Updates to webkit2gtk or pango can subtly alter font metrics and baseline calculations.

The Calibrator is not just a technical test; it is a Contractual Safeguard. Always run a calibration pass before signing off on externally developed templates to ensure they adhere to the physical geometry of the 'Cage' Standard.

8.2 How to Calibrate

To ensure the engine is performing as it should you first need to generate the test documents using the command line interface.

wkgtk-html2pdf will generate a US ANSI A or ISO A4 standard page test document depending on the given command line argument; Both documents will have the same IEEE margins.

wkgtk-html2pdf --calibrate US
Example to generate a 150 page ANSI A test document
Note: To generate an ISO A4 test document use --calibrate ISO instead.

Upon completion 2 files will be generated; these files will be located in the folder where you ran the command and will be named wkgtk-html2pdf-cal- appended with a timestamp and the appropriate extension .pdf or .html

8.2.1 Creep Validation

HTMM doesn't actually generate pages at all so the engine is entirely reliant on coordinates to construct a PDF from an HTML layout. If these coordinates are incorrect (even by as little as a pixel) this will result in an accumulative creep problem where whole lines will be cropped appear on the wrong page. To ensure the engine isn't causing this look at the first page and the last page of the test document and they should be identical.

Creep Validation
Creep validation - All pages are identical.
Note: For the highest degree of certainty use the IS0 version for this test as it has more lines

8.2.2 Testing Browser Calibration

IMPORTANT: If ever you have any appearance issues this is the place to start.

During development of the library, the command line interface and the templates we tested browser from Falkon on KDE to Chrome on Microsoft Windows and managed to ensure parity throughout the spectrum however we have no control over the future development of browsers and therefor highly recommend that you calibrate your browser regularly.

Note: We find it easier on the eyes to use the US calbration page for this test as it has fewer rule lines.

To conduct the test

  1. generate the calibration documents - and open them up in a PDF reader (eg. Adobe Acrobat or Okular) and a browser of your choice.
  2. Set up the browser - so you can see a single entire page on your screen (A border-less browser is best for this).
  3. Align the PDF - Set your PDF viewer to scale to width and with a full page viewable drag the sides to scale the page until the upper and lower green margins in the PDF align with the upper and lower blue margins of the page in the browser.
  4. Check - the lines in between; If they line up then the browser and the PDF engine are calibrated and therefore provided you follow the guidance set out in this document your documentation will align also.
Tip: During testing we discovered that the least forgiving browser was Falkon. This meant that if we made a mistake with our page design or our style sheets it stood out. For the purposes of development we don't consider this a flaw, but an asset and therefore we recommend Falkon if you have the opportunity to use it; although any browser will work, some are more forgiving. At the time of testing Falkon still used an older version of Blink so we expect by the next release that there will be some parity with more recent versions of Chrome and that will likely lead to the loss of the advantage.
Creep Validation
Testing browser calibration.
Tip: Setting the PDF scaling to 88.4% while leaving the browser on 100% should give you a pretty good match on most systems.

8.2.3 Printer Calibration

Testing printer calibration is simply a matter of printing a page out and measuring it. The margins for both US and ISO page sizes have been explicitly set to:

WARNING: Switch off Page Scaliing/Scale to fit before testing.

Most printers have a tolerance level set by the manufacturers, please be aware that the best that can be expected is within that tolerance.

8.3 Quality Control

To ensure that the resultant PDF is an accurate representation of the HTML and to aid in troubleshooting we recommend these guideline are followed:

8.3.1 Structural Integrity

IMPORTANT: line-height ≈ ⌊((multiplier × font-size) ÷ 0.75)⌋ × 0.75

8.3.2 Engine Integrity

8.3.3 Index Integrity

9. C++ API

The wkgtk-html2pdf library provides a professional-grade C++ interface designed for high-performance document automation. Starting with Version 1.0.0, the API utilizes the Pimpl (Pointer to Implementation) idiom, ensuring a stable Application Binary Interface (ABI). This allows the internal rendering engine to be updated without requiring the host application to be recompiled.

9.1 Key Concepts

The wkgtk-html2pdf C++ API is designed for professional document automation where long-term binary compatibility is a requirement. To achieve this, the library adheres to two core principles:

9.1.1 The Binary Wall (Pimpl)

Every public-facing class such as PDFprinter and html_tree utilises the Pointer to Implementation (Pimpl) idiom. The header files contain no private members from third-party libraries (WebKit, PoDoFo, or GLib).

9.1.2 Thread Safety & Initialization

For non-GTK host applications, the rendering engine utilizes a Thread-Safe Singleton pattern to manage the underlying GTK environment.

icGTK::init();
Initializing the Global GTK Context.

This method must be invoked before any PDF generation calls are executed. It initializes the heavy WebKit infrastructure within a dedicated worker thread, isolating the GTK initialisation from your application's main execution loop. As a "Set-and-Forget" object, it provides no public getters or state manipulators; its sole purpose is to maintain the lifecycle of the rendering thread.

WARNING: Do not invoke icGTK::init() from within an existing GTK-based process. Initializing a second global context is redundant and will lead to an immediate application crash.

9.2 The html_tree Class (DOM Construction)

The html_tree class allows for programmatic construction of well-formed HTML without manual string concatenation. cpp

#include <wk2gtkpdf/ichtmltopdf++.h>

// 1. Create the Root
phtml::html_tree dom("html");

// 2. Nest Elements
phtml::html_tree *body = dom.new_node("body");
phtml::html_tree *h1   = body->new_node("h1");

// 3. Set Content (ABI-safe strings)
h1->set_node_content("Professional PDF Report");

// 4. Extract HTML string
phtml::process_nodes(&dom);
const char *html = dom.get_html();

// 5. Cleanup
phtml::PDF_FreeHTML(html);
Minimal example using built in DOM constructor.

9.3 The PDFprinter Class (Rendering)

The PDFprinter class manages the conversion of HTML strings into PDF documents or raw binary data.

#include <wk2gtkpdf/ichtmltopdf++.h>

// Initialize the Global GTK Loop (Call once)
icGTK::init();

phtml::PDFprinter pdf;

// Set input HTML and Output filename
pdf.set_param(html, "report.pdf");

// Set Layout parameters
pdf.layout("A4", "portrait");

// Execute Rendering
pdf.make_pdf();
Generating a PDF.

9.4 Working with BLOBs

For advanced workflows (e.g., post-processing with ImageMagick), the library can return the PDF as a raw memory buffer.

pdf.set_param(html); // No filename provided = BLOB mode
     pdf.make_pdf();

     // Retrieve Binary Data
     phtml::PDF_Blob binDat = pdf.get_blob();

     // ... process binDat.data (size: binDat.size) ...

     // Explicitly free the library-allocated memory
     phtml::PDF_FreeBlob(binDat);

9.5 Variadic Helpers

To facilitate dynamic content generation, the API includes printf-style helpers that handle internal buffering automatically.

new_node_f(const char *format, ...)
set_node_content_f(const char *format, ...)

9.6 Indexing Configuration

The wkgtk-html2pdf engine provides three distinct modes for generating PDF sidebar bookmarks (the document outline). This is controlled via the phtml::index_mode enumeration.

9.6.1 The index_mode Enum

When calling the rendering methods, you must pass one of the following flags:

Constant Description
index_mode::OFF Default. No sidebar bookmarks are generated.
iindex_mode::CLASSIC Scrapes all <a> tags with internal # anchors.See 4.1 Classic mode
index_mode::ENHANCED Only indexes elements explicitly marked with the index-item class. See 4.2 Enhanced mode

9.6.2 API Implementation

To enable indexing within your C++ application, pass the mode as the third argument to the parameter setup function.

#include <wk2gtkpdf/ichtmltopdf++.h>

// 1. Initialise the printer
phtml::PDFprinter pdf("file:///path/to/resources/");

// 2. Set parameters with Indexing Mode
// Signature: set_param_from_file(const char* infile, const char* outfile, index_mode mode)
phtml::index_mode myMode = phtml::index_mode::ENHANCED;

pdf.set_param_from_file("input.html", "output.pdf", myMode);

// 3. Configure layout and render
pdf.layout("A4", "portrait");
pdf.make_pdf(); 

9.6.3 Strategic Usage

WARNING: Setting indexing to enhanced mode without using the bundled templates and declaring .page and .subpage <div> containers will cause undefined behaviour.

9.7 GTK Development

Because a single Linux process cannot safely load both libgtk-3 and libgtk-4 simultaneously, wkgtk-html2pdf is distributed in two distinct builds. Selecting the correct version depends entirely on your application's environment.

9.7.1 Headless applications

The library supports both GTK3 (WebKit 4.1) and GTK4 (WebKit 6.0) targets. Thanks to our Pimpl-shielded architecture, the headers and public API symbols remain identical across both versions. To switch your build target, simply update your pkg-config flags:

9.7.2 GTK Applications

Attempting to link a GTK3-based host application against the GTK4 version of the library (or vice-versa) will result in an immediate Segmentation Fault or a Critical Gdk-Error at startup. This is not a limitation of the library, but a fundamental restriction of

the GTK display backend, which cannot coexist with multiple global versions in a single process space.

Ensure that your build target matches your host environment as described in Section 9.7.1.

9.7.3 Headless Daemons

As WebKitGTK requires a valid display surface to initialize the rendering pipeline, libwk2gtkpdf is bundled with a dedicated background service. This service manages a virtual framebuffer (Xvfb), providing a "Ghost Display" when no physical hardware is available.

Note: During development, we attempted to generate PDFs using the Weston (Wayland) compositor as a headless alternative to Xvfb. However, while Weston is suitable for general rendering, it did not support stable PDF generation at the time of publication. We will continue to monitor Wayland’s headless maturity; until then, Xvfb remains the mandatory standard for server-side production.

For high-availability services (such as automated statement delivery), the engine must be decoupled from the main application thread. This ensures that the "heavy lifting" of WebKit rendering does not block your application’s supervisory logic or network listeners.

The recommended lifecycle for a long-running service involves initializing the global singleton in your main() entry point and delegating the document production to a dedicated worker thread.

int main(int argc, char** argv) {
// 1. Initialize the Global GTK Context (Once per lifetime)
icGTK::init();
// 2. Spawn the Industrial Delivery Thread
std::thread t1(& {run_statement_delivery_service();});
t1.join();
return 0;
}

This pattern has been forensically verified for stability. During a 20-day "Longevity Audit" of the Inplicare Automated Account Statement service, this exact implementation demonstrated:

IMPORTANT: The icGTK::init() call is a Global Anchor. Once set in main(), any thread within the same process space can safely trigger a PDF render, provided the host is built against the correct GTK target (See Section 9.7.1)

9.7.3.1 Service development

The most critical failure point for a headless service is the termination of the Xvfb display server. Because WebKitGTK maintains a persistent connection to the display surface, the loss of Xvfb will cause an immediate, unrecoverable crash of your host application.

libwk2gtkpdf communicates directly with the systemd-logind and D-Bus bus. If the mandatory xvfb.service is inactive, the engine will:

Note: There is no need to add xvfb.service to your daemon's configuration; Your daemon starts, initialises libwk2gtkpdf, libwk2gtkpdf then starts xfvb if it isn't already running.
[Unit]
Description=Foo Daemon
# Ensure the network is up so we can fetch assets or talk to APIs
After=network-online.target
Wants=network-online.target

# Prevent the service from infinite-looping if it fails
StartLimitIntervalSec=60s
StartLimitBurst=5

[Service]
# self-healing policy
Restart=on-failure
RestartSec=5s

# The user/group should have write access to your logs and temp folders
User=bar
Group=bar

Type=simple
ExecStart=/usr/bin/your-daemon-name --verbose --config /etc/foo/config.json

# Clean shutdown handling
KillMode=process
ExecReload=/bin/kill -HUP $MAINPID

[Install]
# This ensures the daemon starts automatically at boot
WantedBy=multi-user.target
Example service file.

To prevent the engine from waiting for desktop-only services, init() explicitly neuters the following background portals: